| |
 |
Copyright
This manual is the copyright of NetOnNet AB. No part of this manual may be revised, copied or transmitted in any way without written permission from NetOnNet.
Statement
This manual does not provide any warranty or related declarations. NetOnNet will not be responsible for any data loss directly or indirectly for the products it mentions. All information in
this manual including the product specification, pictures and literatures is just for reference, NetOnNet reserves the rights to update contents of this manual without further notice.
Trademark
The trademark used in this manual is just for interpretation.
Guidelines for operating environment
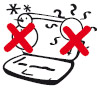
- Please do not operate your netbook in a dirty or dusty environment. Do not use your netbook in a moist place, such as exposing it to rain or humidity; do not use it in a musty basement. Never leave your netbook
near the electric cooker or kettle where the air is moist.
- Do not expose the netbook to direct sunlight for long periods. Never leave your netbook in a car in direct sunshine.
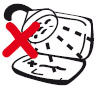
- Always keep the radiator holes clear. Do not operate the netbook on a soft surface, such as quilt, sofa or blanket to make sure the radiators can work normally and prevent
the netbook from overheating. Also please ensure that the netbook is certain distance away from an electric heater or furnace, unless there is good ventilation.
- Do not place the netbook in subzero (under 0 °C) or high temperature (over 50 °C) surroundings, which could cause the hardware to operate abnormally.
- Do not put the netbook near magnetic field.
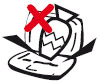
- Do not place the netbook on unstable trolleys, chairs or desks, to avoid any damage if the netbook falls.
- Do not put heavy objects on the netbook, to avoid any damage.
2
|
- Make sure the netbook is free of shock or impact; Always use the correct bag to carry the netbook, do not keep too many things in the bag to avoid any damage to the LCD screen.
- Never spill any liquid on the netbook; do not eat in front of the netbook, keep the drinks far away, to prevent the food or drink spoiling any components or causing a malfunction. Do not use the netbook when
your hands are wet, to avoid water seeping inside.
- Shut down your netbook during take off or landing of a plane; do not use the netbook near the medical apparatus in hospital.
Instructions for Netbook using
- Do not use netbook for extended periods, which could cause tiredness or even injury. Watching the LCD screen can cause eyestrain; keeping your body in the same pose for a long time or repeating the same action
may result in muscle injury, such as operating the keyboard touch pad or mouse too frequently for too long a time.
- Please adjust the LCD screen angle, the height of your desk and chair to the position where you can operate most conveniently and comfortably.
- The netbook will emit heat to the surface of the machine during operating or charging, do not put the netbook on your knees
or any other part of your body, to avoid any discomfort caused by the heat from netbook.
- Do not touch or press the LCD screen with your hands, this could damage the screen. To avoid violent impact never shut the netbook heavily.
- To avoid overheating and make sure the machine works normally, never cover the heat emitting holes.
- Do not insert any objects into the ventilation holes or other holes in the netbook, otherwise it could lead to damage to the internal components.
- In the event the netbook cannot be shut down normally, please press the power key for over 4 seconds to shut it down.
|
Instructions for using the LCD screen correctly
- To avoid unnecessary damage to the netbook, please handle the LCD screen cover gently when opening or closing.
- Do not put any objects on the LCD screen, to avoid damaging the internal elements.
- Do not touch the LCD screen with a finger or any other sharp object.
- To avoid scratching, do not let hard objects (such as fasteners, watch, belt and buckle, etc.) touch the LCD screen.
- Do not use any chemical detergent to clean the screen.
- Please use a special cloth to wipe the screen, do not use your hand to avoid leaving fingerprints on it.
- Do not let any liquid seep in to the LCD screen to avoid damaging the internal components.
Instructions for use the power adapter
- To make sure the netbook works normally, the power supply must comply with the range identified on the adapter label. If you are not sure about your connecting voltage,
please consult the distributor or your local power supply company.
- Please do not use unapproved adaptors for this netbook, neither can the adapter supplied with this netbook be used for other electrical equipment.
- Please do not place any objects on the power line, do not put it in a place where it is easy to trample.
- Hold the plug body when you take the plug out from the socket, do not drag the cable line directly.
- The adapter will heat up after working for some time, please keep it where it has good ventilation.
Cautions for battery using
- Please only use the battery supplied together with this netbook, or buy the same battery from our authorized distributors.
- Do not refit or re-assemble the battery without authorization.
3
|
- Do not play with the battery. Put the battery beyond children´s reach.
- Handle the battery safely. Never expose the battery to fire, otherwise it could lead to explosion.
- Please handle the failed battery according to local laws or regulations, do not discard it anywhere.
Cleaning
- Before cleaning the netbook, please shut off the netbook, take the plug from the socket and take the battery out.
- Please use the special cloth and water for cleaning the netbook, do not use rough or corrosive material for cleaning, never use a chemical cleanser.
Maintenance
- Nobody is allowed to do maintenance to the netbook without permission. Improper disassembly could lead to electrical shock or other dangerous results. Please consult our technicians if you have any questions.
- Please keep the packaging, it could be used to protect the netbook if there is a need to send it back for maintenance.
- Please refer to the warranty manual for detailed guarantee clauses.
- Please take out the power plug and consult our professional technicians in the following cases:
- The cable line and plug has been damaged.
- Liquid entry into the machine.
- The netbook falls to the floor or the case cracks.
|
Manual
English
On – a different brand
On is more than a brand. It’s a declaration of proof. When we place On on one of our products, we’ve worked hard to ensure that it maintains a high level of quality. That it’s
modern, yet have a proven track record. That it’s well designed and offers a good price compared with similar products. In short,
On is an extension of the NetOnNet brand.
The On brand is all about keeping things simple. Which is exactly what you should expect from a brand that comes direct from the warehouse shelf.
4
|
 |
Directory |
1. Synopsis of notebook .......................................................................................................................................................
1.1 About this manual .......................................................................................................................................................
1.2 Security knowledge ....................................................................................................................................................
1.3 Notes on carried out ...................................................................................................................................................
1.4 Preparations before using ..........................................................................................................................................
|
6
6
6
8
8
|
2. Introduction to each part ...................................................................................................................................................
2.1 Front side .....................................................................................................................................................................
2.2 Bottom side ..................................................................................................................................................................
2.3 Right side .....................................................................................................................................................................
2.4 Left side ........................................................................................................................................................................
|
9
9
11
12
13
|
3. First use .............................................................................................................................................................................
3.1 Power supply system ..................................................................................................................................................
3.2 Using the keyboard .....................................................................................................................................................
3.3 Using the touchpad .....................................................................................................................................................
3.4 Network connections ...................................................................................................................................................
|
14
14
19
23
24
|
Appendix ................................................................................................................................................................................
Appendix A Failure analysis and solution .......................................................................................................................
Appendix B Some questions about the battery ..............................................................................................................
Appendix C Production spec ...........................................................................................................................................
|
25
25
26
28
|
Pay attention to the overstriking notice items and warnings, which can help you to complete special operations safely and successfully. The warning notices have
different degrees of importance and they are as follows:
 |
Reminder of danger of data loss, equipment damage or personal security risks because of incorrect operation. |
 |
Reminder of possible damage because of incorrect operation. |
 |
Remind important information, the general attention, related to use of the netbook. |
|
5
|
|
Chapter 1 Synopsis of notebook |
1.1 About this manual
1.2 Security knowledge
1.3 Notes on carried out
1.4 Preparations before using
1.1 About this manual
The contents of this manual:
1. Brief introduction:
Introduces the notebook and manual.
2. Browse every part of notebook
Introduces every part of notebook special, the notice items, maintenance, etc.
3. Before use
Preparation and notice items before booting.
4. Using
Basic operating procedure
5. Appendix
Introduces fittings, the nomenclature of computer and security information.
6
|
|
Symbols in the user manual and quick guide are for reference only, there may be differences between the product and purchased product in appearance and colour.
1.2 Security knowledge
These notice items below will help to prolong your notebook’s life. If you have any questions about use, you can ask for help from professional persons if the answer is not in the manual.
Do not use a damaged power cable, attachment or other peripheral device. Prevent fluids such as thinners, benzene or other chemicals coming into contact with your notebook.
|
Before cleaning your notebook, please pull out AC, then use clean gauze or buff with a cleanser and several hot gutta to brush your notebook, wipe it with dry fabric finally.
|
|
|
 |
Chapter 1 Synopsis of notebook |
 |
Do not put your computer on sloping or unbalanced objects. If the case is damaged, please call for aftercare service. |
 |
Do not touch or press the LCD screen with fingers. Do not place the notebook on fingers. Do not place another notebook on our notebook. |
 |
Do not use the computer in a dusty or dirty environment. |
 |
Do not place the notebook on your leg or other part of your body to avoid thermal burning. |
 |
Safe temperature: the safe range of temperature is 0°C (32°F) – 40°C (104°F) range. |
 |
Do not throw away the notebook as common garbage, please dispose of in accordance with local regulations for electronic devices. |
7
|
 |
Do not put heavy objects on or plug smaller objects into your notebook. |
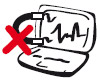 |
Do not place your notebook near magnetic objects. |
 |
Avoid exposing the notebook and its attachment to rainwater or humid air, please do not use during lightning. |
 |
Battery safety warning: Do not throw it into fire. Don’t connect positive pole with negative pole. Do not damage it by yourself. |
 |
Input voltage: please refer to voltage label pasted on the bottom of the AC adapter; make sure that your AC adapter can be used. |
 |
Do not cover or pack your notebook when the power is on, this will affect the air circulation causing a very high temperature for the computer. |
|
|
Chapter 1 Synopsis of notebook |
1.3 Notes on portability
You should cut off the power of your notebook and pull out all attachments before carrying it to avoid damaging the interfaces.
The magnetic head of the hard disk (HDD) will retract when you cut off the power, preventing the HDD surface from being scraped during
transit. Therefore do not carry it with the power on. Make sure the cover is closed and the lock is shut before carrying it, in order to protect the keyboard and LCD.
|
If the notebook was not maintained properly, the surface will lose shine easily. Please be careful not to scrape or rub the surface when carrying the notebook.
|
Notebook bag
You can buy a notebook bag to prevent the notebook from dust, water or scrapes etc.
Charge the battery
If you want to use battery as the power source of the notebook, please charge the battery beforelong journeys. Remember: the notebook will charge immediately as long as
you plug the AC power. However, the time of charge will be prolonged if you use the notebook at the same time as charging it.
Use during air travel
Please contact the airline company you fly with if you want to use the notebook while travelling, because the majority of companies have strict rules about using electronic products on
planes. They allow use of electronic products at anytime except for takeoff and landing.
|
There are three security inspections in the airport: An X-ray detector laid on the luggage conveyor belt, a magnetic detector used for people passing through security gate, a magnetic detection baton
used for devices and personal items with themselves. You can lay notebook under X-ray detector to detect, but through neither the magnetic detector nor near magnetic detect stick.
|
8
|
1.4 Preparations before use
Connect the AC adapter
Every notebook is equipped with an AC adapter that will provide electricity for the notebook when connecting to the mains supply with AC. It can also be used together with the battery.
Open lid
Please open the lid gently so as not to destroy the lid.
Power on
Press the power switch once when the notebook is opened. Please make sure the power switch indicator lights when the switch is powered on.
|
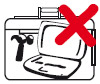
Never carry the notebook by the LCD screen!
|
|
|
Chapter 2 Introduction to each part |
2.1 Front side
2.2 Bottom side
2.3 Right side
2.4 Left side
|
The pictures and icons in this manual are just for reference, they may differ from the product you bought.
|
2.1 Front side
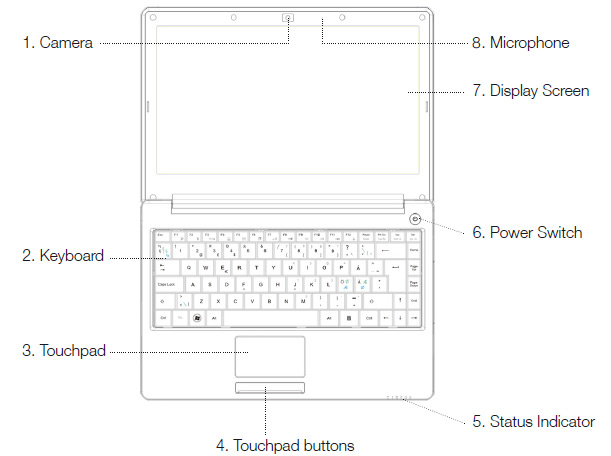
Please identify top components as shown below.
1. Camera
Built-in camera can take photographs or capture a video, and is compatible with other devices, it can also be used to hold video conferences.
2. Keyboard
The notebook keyboard is of standard size; you can put both hands on it, making it more comfortable. There are two Windows function
buttons; making it easier to browse the Windows operating system.
|
|
3. Touchpad
Move your finger to control the mouse within the effective range.
4. Touchpad Buttons
Supplies the same function as the left and right mouse buttons, you can single or double-click, drag, right-click and other operations.
|
9
|
|
|
Chapter 2 Introduction to each part |
5. Status Indicator (Front)
Shows the status of hardware/software, which is detailed below.
6. Power Switch
The power switch is used to turn the notebook power on or off. Pressing the key will power it on and off. You can modify the behaviour related to various actions in power supply options of the control panel.
7. Display Screen
The display is similar to that of desktop computer. Please wipe the display screen with a soft cloth that does not contain chemical liquid. You can add a little water if necessary.
8. Microphone (built-in)
The built-in single-track microphone can used in video conferences, for oral records or simple audio recording.
|
Status Indicator (From left to Right)
 |
| 1. Wireless indicator |
2. Bluetooth indicator |
| 3. Caps lock indicator |
4. Num lock indicator |
| 5. HDD Indicator |
6. Battery charging indicator |
|
Do not put anything such as pencil, paper, etc between the LCD screen and the keyboard, it may damage or scratch the LCD screen. Do not use
abrasive cleaners to wipe the LCD screen, this will damage the screen.
|
10
|
|
Chapter 2 Introduction to each part |
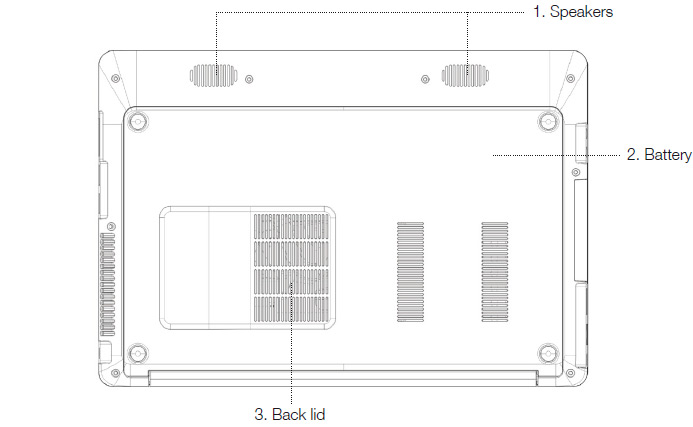
2.2 Bottom side
Please identify bottom components as shown below.
|
Due to differences of PC type, appearances may not the same as the icon below.
|
|
The PC bottom will become very hot during use. So you should be careful while the notebook is in use or has recently been used. It is natural that the
notebook becomes hot when using or charging. Do not place it on a soft surface like a bed or sofa, or else the heat of notebook will be dissipated
abnormally. To prevent scalding, please do not place the notebook on your legs or other part of the body.
|
1. Speakers
The loudspeakers are located at the bottom of the computer, with one on each side.
|
|
2. Battery
Battery will charge automatically when AC power is plugged in, when AC power is cut off, the notebook will be supplied by the battery. Thus, no matter where you are and when you
can use it. Battery life length will be different because of usage and specification.
3. Back lid of computer
Back lid is used to protect the motherboard and the components in it.
|
11
|
|
Chapter 2 Introduction to each part |
2.3 Right side
Please refer to the icons below to identify
components on the right side of the computer.
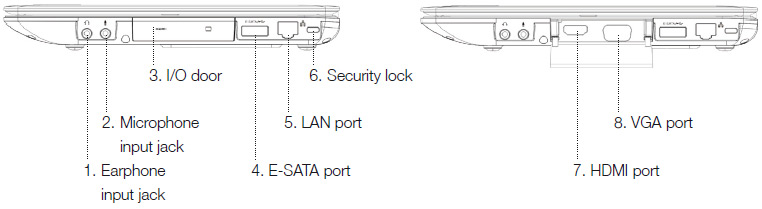
1. Earphone input jack
The sound earphone jack is used to connect the audio output signal to external speakers or earphones.
The internal sound will automatically stop when the jack is used.
2. Microphone input jack
The mono microphone jack can be connected with an external microphone or output signal from an audio device. The internal microphone will automatically stop when the jack is
used. The function can be used for video conferences, oral records or simple audio recording.
3. I/O door
4. E-SATA port
It is used to connect E-SATA devices, theoretical data access speed rates of up to 3Gbps. The E-SATA port supports the USB 2.0 standard.
5. LAN port
The RJ-45LAN is used to connect to a wired network. One can use the built-in port without any extra adaptor.
|
|
6. Security lock
Connect the device to a security cable lock.
|
The security cable lock is used as a precautionary measure only and cannot prevent the improper use of stolen equipment.
|
7. HDMI port
You can connect video equipment such as TV or projectors to the notebook.
8. VGA port
D-sub display port with 15 pins supports equipment that is compatible with the VGA standard, such as a display or projection facility
so that people can watch through a larger external screen.
|
12
|
|
Chapter 2 Introduction to each part |
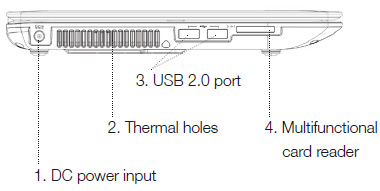
2.4 Left side
Please refer to the icons below to identify
components on the left of the computer.
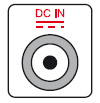
1. DC power input
The supplied power adapter can change AC to DC. The power adapter supplies power to the notebook through this jack, and provides charging
power for the battery. To avoid damaging the notebook and battery series, please make sure to use the supplied power adapter.
|
The power adapter will get hot during use. Please do not cover the adapter, and do not let the adapter approach your body.
|
2. Thermal Holes
Heat exhaust for air, do not cover the hole.
|
|
3. USB 2.0 port
The universal serial bus is compatible with USB 2.0 items, such as keyboard, camera, hard disk, printer and scanner. Serial transmission speeds of USB 2.0 can reach 480Mbps.
4. Multifunctional card reader
This internal memory card-reader is more convenient and faster for reading than most of the same type, because it is equipped with a high
bandwidth PCI bus. This computer can read four kinds of cards; MS, SD, MMC, MSPRO.
|
13
|
|
Chapter 3 First use |
3.1 Power supply system
3.2 Specific functions of the keyboard
3.3 Using the touchpad
3.4 Network connections
3.1 Power supply system
Using AC power
Both the battery and power adaptor can supply power to notebook. The power adapter converts AC into DC via a socket. That means one can connect a power line to any socket
of 100v-120v or 220v-240v without setting a switch or using a power commutator. Different countries may use a different normal interface to connect the AC power line.
|
One can buy a notebook travel suite, containing power supply, which can be used in any country.
|
Please insert the AC power line into the socket along with over voltage protection and the adapter link to the power line, then insert DC BNC into the power jack. First, please connect
the adapter to AC socket, inspecting whether the adapter is compatible with socket or not. If the adapter indicator is green, it shows that the adapter is working with correct voltage.
|
If you use a different adapter to supply power to notebook or use the adapter charge for another electronic device, which will damage either/both the adapter or the device. If there is smoke or a
high level temperature, please ask for service. If you suspect the adapter is damaged, please contact the local service centre. A damaged adapter may damage your battery pack and notebook.
|
14
|
|
|
The pictures and icons in this manual are just for reference, they may differ from the product you bought.
|
|
The adapter may get hot. Please do not cover the adapter, or let it touch you.
|
Using battery power
The notebook itself is designed to operate with the portable battery pack. One fully charged pack can supply several hours of power, using the power management function can prolong
battery life via settings in BIOS.
|
|
|
Chapter 3 First use |
Battery protection
Like other chargeable batteries, the battery pack of the notebook has a limited time of use. The perfect temperature range is 10-29°C. You should think about that the outer temperature
is higher than the inner. When the use time of the battery pack becomes shorter and shorter, buying a new battery pack for your computer via licensed dealer is the best.
|
Please do not throw the battery into fire, short circuit or disassemble the battery. If the battery packs work abnormally, please turn off the
computer and contact a service centre.
|
Starting up the notebook
When you start-up the computer, power on information will be shown on the screen. You can adjust brightness using the hotkey if necessary. If you need to enter BIOS settings
or modify system configuration, press F2 or Del quickly. You can see start-up options if you press Tab key during the start-up process, at the same time pressing F8 will enter advanced
options, then you can choose start-up model. ESC means returning.
|
Please wait 5 seconds after shut down before restarting the notebook to protect the hard disk.
|
|
Please do not cover or pack the notebook when power is on, that will lead to high temperature and influence ventilation.
|
Power On Self Test (POST)
When the notebook is powered on, the system runs a series of software controlling diagnostic tests, which make up the power on self test. Software control POST is a part of the permanent
configuration. POST contains a hardware configuration record that was established by the BIOS setting used to diagnose the system. If POST finds disagreements between the record
and hardware, the screen will show information that you should run the BIOS settings to correct the conflict. After a completed test you may receive the information "BOOTMGR is
missing: Press Ctrl + ALT+ Del to restart" if
15
|
hard disk does not load any operating system. That means it has inspected hard disk and prepared to install the operating system.
Self Monitor And Record Technique (SMART)
During POST, if self-monitoring of SMART analyses and finds error state of hard disk it will show a warning. Please back up important data to external hard disk or USB disk and
run disk inspect program of Windows: click start > my computer > right key click hard disk icon > properties > tools > error checking > check now...
|
If there is a still a warning during start-up after running software disk detection program, please take your computer to service centre, continued use will lose data.
|
Battery power detection
The battery system adopts an "intelligent battery" technology, which shows remaining power of battery. A fully charged battery can supply several hours of power for the notebook.
But actual hours depends on how the function of power saving, common habits, the size of CPU, RAM and screen are used. To check the remaining battery power, you can move cursor to power icon on right of the
taskbar. The "battery" icon is showed when running on battery. The icon changes when using AC power. Double-click the icon to gain more information about the setting.
|
A warning shows when the battery power is insufficient. The notebook will enter suspended mode (Windows acquiescence STR "Suspend-to-RAM" mode) if you ignore the warning.
|
|
STR model will not last a long time when power is exhausted. Suspend-to-Disk (STD) model not equal to power off STD models need a few power supply, which will pause when power is exhausted.
|
|
|
Chapter 3 First use |
Charge the battery pack
You must charge the battery pack when travelling. The battery pack begins to charge as soon as the adaptor is plugged into external power. Please charge the battery pack fully
before first use. It will take several hours to fully charge when the notebook is powered off and double the time when the power is on. The battery indicator will go out when charging is complete.
|
If the temperature is too high or battery voltage too high, the battery will stop charging. BIOS supplies intelligent charge functions. If the process of battery
approval has failed, please stop charging and contact a service centre.
|
|
Charge the battery regularly. Battery pack will discharge with time. Please charge every four months if unused for a long time, otherwise it cannot charge.
|
Power switch options
The power switch can power the notebook on or off, and let the notebook enter into standby or hibernation states. All kinds of actions of the power switch can be user-defined in "power
options" of the control panel.
Switch user, reboot, standby or power off and other option can be obtained by right clicking the icon to select.
Reboot
After installing some programs, the system may pop-up a dialogue box requiring you to reboot the notebook. If you want to reboot please select.
|
Please wait 5 seconds after shut down before restarting the notebook to protect the hard disk.
|
16
|
Power off forcibly
In case of abnormal states, please use the following mode to power off notebook: Press the power button for more than 4 seconds.
|
Please do not power off suddenly; otherwise data may be lost or damaged.
|
Battery management mode
The notebook has some automatic or alterable functions that can help save electricity and prolong the life of the battery as well as reducing the total cost. You can control these
functions by setting the electricity menu in BIOS. ACPI electricity management setting can be done by the OS. Electricity management functions makes all the components work
under the low-electrical mode in order to save electricity as much as possible and still support the necessary circulation of system.
Standby and hibernation functions
(energy saving state)
You can find the electricity management in Windows > Control panel > Power options. You can also select standby/hibernation or shut down for pressing the power switch or closing the lid.
Standby and hibernation can help close some components to save power. When resuming operation, the system will return to the primary state. "Shut down" will close all operations and
ask if you want to save the unsaved files.
|
When the device is in "Standby" or "Hibernation" modes, the notebook cannot start any type of network connection or perform any device function.
|
|
|
Chapter 3 First use |
Enter and exit standby mode
While entering the standby mode, current data and working state will be saved into RAM, and some components of the computer will be closed. RAM needs electricity to save data. By
pressing the button “start” and then a little arrowhead sign, you can see the standby option. Also you can use Fn+F1 to activate this mode and any key except Fn to resume operation.
Press the power switch to exit "Standby" mode, the power light comes on, the screen returns to the place where you previously stopped working.
|
While entering the standby mode, the power indicator will flash.
|
|
If you have set the "standby" mode to need a password, you must enter the Windows password to return to your previous work.
|
Enter and exit hibernation mode
While entering the hibernation mode, current data and working state will be saved into the HDD. Under this mode, there is no need for RAM to update at fixed time and power consumption
will reduce significantly. Meanwhile the computer will need a little power to support some components, for example LAN. Hibernation mode saves more power than standby
mode. By pressing the button "start" and then a little arrowhead sign, you can see the hibernation option. Pressing the power button makes the computer resume.
Press the power switch to exit "Hibernation" mode, the power light comes on, the screen returns to the place where you previously stopped working.
|
When entering the hibernation mode, the power indicator will go out.
|
|
If you have set "Hibernation" mode to need a password, you must enter the Windows password to return to your previous work.
|
17
|
Use of the power scheme
Power scheme is a collection of system settings for using the power management device. Power scheme will help to save power or to maximize device performance.
You can use the following power schemes:
• High performance
• Balanced
• Power saver
You can use the "Power Options" to change these power scheme settings.
View the current use program
Click the icon of the power table at the far right of the taskbar notification area
Or
Choose start > Control Panel > Hardware and Sound > Power Options.
Choose a different power scheme
Click the icon of power table at the far right of the taskbar notification area. Then select a power scheme from the list.
Or
1. Choose start > Control Panel > Hardware and Sound > Power Options.
2. Select a power scheme from the Power Schemes list.
3. Click OK.
Custom power scheme
1. Choose start > Control Panel > Hardware and Sound > Power Options.
2. Select a power scheme from the Power Schemes list.
3. If necessary, modify and connect to AC power and use battery settings.
4. Click OK.
|
|
Chapter 3 First use |
Password-protected settings at the time of exiting standby mode
To set a password that is needed when exiting "standby" mode, follow these steps:
1. Right-click the power table icon of the notification area, and then click change plan setting; or select start > Control Panel > Hardware and Sound > Power Options.
2. Click the "Require a password on wakeup".
3. Select prompting a password check box when the computer wakeup from standby mode.
4. Click Apply.
Turn off devices
|
Unsaved information will be lost when turning off devices.
|
Shutdown command will close all the open programs (including operating system), then turn off the display and devices.
For any of the following conditions you should turn off devices:
• When replacing batteries or maintaining internal components of devices.
• When devices will be disabled or disconnected from the external power supply for a long time.
To turn off devices, follow these steps:
|
If the device is in "standby" status or "sleep" mode, you must exit "standby" status or "sleep" mode, and you can then turn off devices.
|
1. Save your work and close all open programs.
2. Choose start > turn off computer > turn off.
18
|
If the device does not respond, and you cannot use the shutdown steps above, please try the following urgent steps to order:
• Press ctrl + alt + delete key combination. Then click shutdown > turn off.
• Hold down the power button for at least 4 seconds.
Thermal mode power control
There are three types of power control to control the radiator of computer. These ways need configuration, but can be known. The temperature in the following refers to that of computer case (not that of CPU):
1. When the temperature reaches the upper limit of safety temperature, the sector will start to rotate.
2. When the temperature exceeds the upper limit of safety temperature, the CPU will slow down and the temperature will reduce.
3. When the temperature exceeds the upper limit of the greatest safety temperature, the system will be closed abruptly to make the temperature reduce.
|
|
Chapter 3 First use |
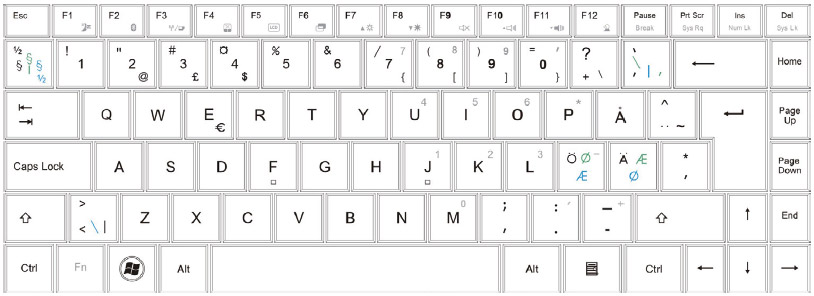
3.2 Using the keyboard
The keyboard is used to key words and
commands of computer input devices.
Lock keys
There are three lock keys on the keyboard, they are
the on / off switch for the relevant functions.
| Key |
Description |
 |
When Caps lock is on, all characters typed are in uppercase. You can determine the working status of Caps lock through the status light. |
 |
When the Num lock key is locked, the embedded keypad will be in digital mode. All keys are same as the calculator function keys (including,-,*,/ arithmetic operators). If you want to
import large quantities of digital information, this model would be very appropriate. |
 |
When Scr lock key is locked, you can respectively press the up ( ) or down ( ) or down ( ) button. The
screen that moves up or down one line. Scroll lock key may not work in some applications. Det är inte säkert att tangenten Scroll Lock fungerar i alla program ) button. The
screen that moves up or down one line. Scroll lock key may not work in some applications. Det är inte säkert att tangenten Scroll Lock fungerar i alla program |
19
|
|
Chapter 3 First use |
Numeral Keyboard
The embedded numeral keyboard is
similar to that in a desktop computer.
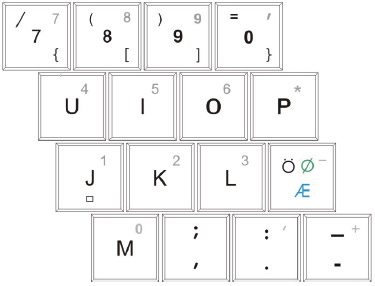
With the embedded numeral keyboard locked, you can do the following:
- Use the embedded number keys on the keyboard to enter numbers.
- At the same time, press the Fn key on the numeric keypad embedded press the corresponding key to enter characters; simultaneously press the Shift key to enter the capital letters.
|
20
|
|
Chapter 3 First use |
 |
Identify hotkey
This part introduces the hotkeys in the notebook keyboard. All of the hotkeys are used with the function key. |
|
Press  with following keys to use the hotkey. with following keys to use the hotkey. |
| |
Symbol |
Description |
| Fn+F1 |
 |
Sleep button - Put the computer in sleep mode. Depends on settings of the sleep button in power management mode. |
| Fn+F2 |
 |
Bluetooth devices switch controls - Turn on or off the Bluetooth connection.
(Only applies to models equipped with Bluetooth). |
| Fn+F3 |
 |
Wireless switch controls - Turn on or off the internal wireless device. |
| Fn+F4 |
 |
Touch Pad - Turn on or off the touch pad. |
| Fn+F5 |
 |
Backlight control keys - Turn on or off the LCD backlight. |
| Fn+F6 |
 |
LCD/External display switching - Switches display output between the display screen, external monitor (if connected) and both. |
| Fn+F7 |
 |
Brightness increase key - Increases the screen brightness. |
| Fn+F8 |
 |
Brightness decrease key - Decreases the screen brightness. |
| Fn+F9 |
 |
Sound mute key - Sets the sound volume to mute. |
| Fn+F10 |
 |
Sound increase key - Increases the sound volume. |
| Fn+F11 |
 |
Sound decrease key - Decreases the sound volume. |
| Fn+F12 |
 |
Camera control key - Turn on or off the camera. |
| Fn+Prt scr/Sys Rq |
|
Capture the current desktop display. |
| Fn+F |
|
Turn on or off the power saving mode. |
| Fn+C |
|
Turn on or off bright mode. |
| Fn+Ins/Numlk |
|
Enable or disable the Num Lock. |
| Fn+Del/Scr Lk |
|
Enable or disable Scroll Lock. |
21
|
|
Chapter 3 First use |
Windows Key
There are two keys on the keyboard to
perform Windows-specific function

| Key name |
Description |
Windows logo key
 |
Start button, perform functions with the shortcut key combinations.
Here are some examples:
+ Tab (switch between active programs)
+ E (visit "My computer")
+ F (find file)
+ M (minimize all)
+ R (display "Run" dialog)
Skift + + M (undo "Minimize all")
+ D (show desktop)
|
Application key
 |
Open the shortcut menu (right-click equivalent) |
22
|
|
Chapter 3 First use |
3.3 Using touchpad
Only a finger tip can control the touchpad. Because it is induced by static, it cannot be induced by any implement instead of fingers. The main function of the touchpad is to replace
the normal mouse of a desktop computer, and can be used to position the cursor anywhere you want to scroll, or choose the items on the display with your finger tip.
Graphic explanation for using touchpad
|
| Glossary |
Description |
| Point |
Please put your figure in the centre of touchpad and glide it to the position that you want to move towards. |
| Click |
Make the cursor stop at an item, press the button. |
| Double-Click |
Move the cursor towards the icon that you want to run, and press the left button twice or tap the touchpad twice continuously and quickly, and then system will start the corresponding program.
If the interval of pressing or tapping is too long, it won’t have any effect. |
| Drag |
Choose an item and put it anywhere of the screen. Move the cursor towards the item you want to choose, keep it, and press the left button, then move it towards where you want to
place it and release. Or else, while using the finger tip to drag, you have to tap gently on the item for the first time and then skim through the touchpad while tapping the second time,
then move the cursor towards where you want and then release it. |
Handling the touchpad
Touchpad is a panel induced by pressure. It can be damaged without proper maintenance.
Please note the following measures.
1. Try to avoid having any harmful substances such as dust, liquid or oil, come in contact with the touchpad.
2. Do not touch the touchpad with dirty or wet hands.
3. Do not scratch the touchpad with nails or any hard things.
4. Do not put any heavy objects on the touchpad or its buttons.
|
|
|
After setting the internal touchpad application software the scroll function controlled by software can be used and it will make it easier to browse
Windows or websites. One can regulate main functions in control panel of Windows, so as to make it convenient to choose and tap.
|
|
23
|
|
Chapter 3 First use |
3.4 Network connections
The notebook supports the following types of Internet access:
• Cable – an RJ-45 (network) jack can be used to connect to a broadband network to access the Internet.
• Wireless - wireless access points can be used to access the Internet.
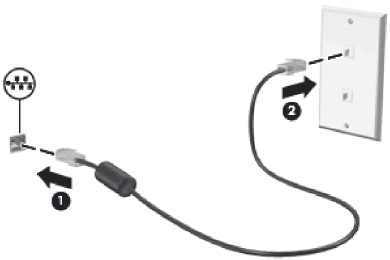
Connecting to the a wired network
A LAN connection needs an 8-pin RJ-45 network cable (purchased separately).
To connect network cables, please do the following:
|
To reduce risk of electric shock, fire or damage to devices, please do not put a modem cable or telephone cable into the RJ-45 (network) jack.
|
1. Put the network cable into the network jack on the device (1).
2. Put the other end of network cable into a wall jack (2).
Connect to a wireless network
Wireless technology uses radio waves to replace cable to transfer data.
Wireless LAN (WLAN) device - connect the device to the company office, home, as well as airports, hotels, coffee shops, hotels and schools and other public places within the
wireless local area network (often referred to as a Wi-Fi network, wireless LAN or WLAN).
24
|
In the WLAN, each mobile wireless device can make communication with a wireless router or wireless access point.
Industrial devices support the following IEEE standards:
• 802.11b is the first widely adopted standard, which supports the 11 Mbps maximum data rate, and 2.4 GHz frequency of operation.
• 802.11g supports 54 Mbps maximum data rate, and 2.4 GHz frequency of operation. 802.11g WLAN equipment is backwards compatible with 802.11b equipment, so they can run on the same network.
|
|
Appendix A Failure analysis and solution |
Unknown reason – the system is unstable:
Does not come back from hibernation
1. Remove upgrade installation section after purchase (RAM, HD, WLAN, Bluetooth).
2. Please try to recover former MS system if it is not the reason above.
3. Please partition recover if the question is still relevant.
4. Please contact a local service centre if the question is still relevant.
|
Please backup all data to anther zone before recovering.
|
Hardware problem – Internal camera:
Internal camera can't work
1. Use device manager to check whether it has a problem.
2. Try to install a fresh camera driver.
3. If you do not solve the problem, please upgrade BIOS to the newest version and try again.
4. If the problem still exists, please contact a local service centre.
Hardware problem – Battery:
Battery maintenance
1. The battery pack should protect against over-charge automatically, so it won’t damage the notebook.
2. It suggested that you recharge the battery every three months.
Hardware problem—WIFI:
How to check if the notebook has been installed with internal wireless network card?
Choose control panel > device manager. You can see whether the notebook has an internal wireless network card installed or not in the menu "network adapter".
25
|
|
Mechanism Question – Fan/radiator:
Why is the temperature still high while the fan is working?
1. Please confirm that the fan is working when the temperature of CPU is high and there is main intake ventilation.
2. Please shut down multiple programs running (in taskbar) at the same time to reduce system load.
3. The question may due to a virus, please use defence software to detect.
4. Please use partition recovery if the methods above do not resolve the question.
|
Please copy the data to another partition before restoring.
|
|
To prevent virus’ infection, please do not connect to the Internet before installing antivirus software and firewall.
|
Unknown reason – Blue screen:
Display is blue after system restart
1. Remove expanded memory. If you have installed expanded memory after purchasing the notebook, please shut down and remove expanded memory, then restart the computer to check whether
it behaves normally or not. If the notebook returns to normal, you may be using incompatible memory.
2. Uninstall software application program. You may have installed software that is not compatible with the system; please try to uninstall it.
3. Check your system if it has virus.
4. If the problem cannot be solved, please use the recovery partition and reinstall system.
|
Please copy your data before recovery.
|
|
Please do not connect to the Internet before installation.
|
5. If the problem still exists, please contact local service centre for maintenance.
|
|
|
Appendix B Some questions about the battery |
How to maintain a new battery:
If the new battery is used correctly, the battery life performance will be better.
Please do not forget the following:
1. There is a small quantity of residual electricity in the new battery. You should use up it at the first usage, then charge the battery for no less than 15 hours.
2. After the first charge is completed, please remember not to charge unless the battery been used up. The second and third charge times are no less than 12 hours. After the
third charge, the battery activation will be finished.
The battery life is computed from the time it is produced from the factory. So, regardless of whether you use the battery or not, the service life is in count down, and the battery life will be attenuated.
Generally, one battery can be fully charged and drained about 300~500 times.
26
|
|
What is the judge method about the battery attenuation?
1. The software of Battery Mark is used to test the original use time of the new battery. (Power Option to be set to Max battery mode, lowest LCD brightness, WLAN turned off , no other outside device, no screen savers)
2. At room temperature (25 °C), after charging and discharging for about 100 times, the battery’s actual use time will decrease to 80~85% of the original use time; and after 200 times, it will decrease to
70~75%; and after 300 times, it will decrease to 60~65%.
3. So if the original use time is about 3 hours, and if you fully charge and discharge once every day, then 100 times will be used during 3 months; So, at that time, the battery life will be decreased to 2.4 hours;
After 6 months, the time is 2 hours; After 1 year, the time will be 1.5 hours.
4. As the attenuation of the battery is affected by many factors, and there is quite a difference in use, both in the environment and method, it is unscientific to judge the
quality and performance of the battery by the laptop’s use time. The times given are only for reference.
|
|
|
Appendix B Some questions about the battery |
Factors affecting the battery life and actual use time:
In the process of using laptop computers some factors may deplete the battery, even causing the longest time to be below the standard. But this does not mean that there are inherent issues
with battery quality and performance.
Factors that affect battery use time are as follows:
1: Processor speed – The correct installation of the Intel chipset drivers makes the system processor with Intel Speed Step technology adjust the speed of the processor, thus extending the battery use time in laptop.
2: The capacity of the memory and graphic memory – More applications will occupy a large part of the HDD capacity for file exchange (Virtual Memory), leading to frequent hard disk write and read. So, It
would be useful for the battery life to increase memory capacity.
3: Some applications often auto run in the background. This increases the load on the processor. You can close some applications, and only maintain some essential ones.
4: The brightness of the LCD – Less brightness = more battery time. You can adjust the brightness using the function key.
5: Power Management and Speed Step setup – Different settings of the power option will affect the battery life.
27
|
6. Battery Life – The average life of a battery is 1 year. With increasing use of time and frequency, it is normal that the battery life will decrease.
7: Processor and system device for deeper applications will quickly reduce the battery's available time.
8: Wireless devices and Bluetooth devices will accelerate battery consumption; if you do not need wireless, you can use the keyboard function keys to switch it off to save power.
9: Temperature of the environment when used – Use in high or low ambient temperature will affect chemical substances in the battery core, thereby reducing the time and battery life.
How to deal with a failed or reduced charging
If it appears that the machine is failing to charge, the battery indicator is off, it fails to start-up only with the battery, please send the computer to a local service station to check
if it is a battery issue and it is necessary to change the battery.
As batteries are consumables, and it’s warranty period is short, when the battery is close to the end of its life, it may only be possible to use it for a few minutes even if it is charged
fully. You may need to replace the battery.
How to save the battery, if not used for a long time?
Charge or discharge to 40%, then store in a dry place with a temperature from 15~25° C. Cell aging is accelerated if the storage temperature is too high or too low.
|
|
Appendix C Production spec |
CPU
- Intel Arrandale Processor
Chipset
System memory
- Two memory slots, support 4 GB maximum
Screen
- 13.3" LCD, LED backlight
- Resolution: 1366x768 (16:9)
Display controller
- ATI Mobility Radeon HD 5430
Keyboard
Touchpad
Hard drive
- 2.5" HD, 9.5 mm high, SATA Interface
Audio
- One pre-output to connect headphones, speakers and public address equipment; One microphone jack
Camera
28
|
|
I/O connector
- Cardreader interface (supports the following memory cards: MS / MS Pro / SD / MMC) * 1
- Mini PCIE * 1
- HDMI * 1
- Microphone-in * 1
- Headphone-out * 1
- USB 2.0 * 3, One for E-SATA & USB
- RJ45 * 1
- DC-in * 1
- VGA port * 1
Battery
- 6-cell lithium-polymer battery, capacity 3800 mAh, voltage 11.1 V
LAN
Wireless network
Size
- About 329 * 226 * 25.9 mm
Weight
- About 1.8 kg (with battery)
|
|
|